Deadheading Geraniums: Where to Cut for More Flowers
Deadheading geraniums is usually a one-stalk job, not a haircut. On a flowering Pelargonium, trace the faded cluster’s stalk down to the point where it joins the main stem or a healthy leaf node, then remove that entire stalk. Taking off only the brown petals leaves the developing seed capsule behind, which is the part the plant is still investing in.
That small distinction explains many disappointing results. A plant can look tidier after you pinch off spent petals and still spend the next stretch of good weather filling seed capsules instead of producing another set of flower buds. Deadheading can improve the plant’s flowering rhythm, but it cannot repair deep shade, a cramped root ball, erratic watering, or heat stress.
The word “geranium” complicates the advice. Most bedding and container geraniums are Pelargonium, including zonal, ivy-leaved, regal, and scented types. Hardy Geraniums are a different group of plants with a different growth habit. The cut below is for the common flowering Pelargoniums unless a section says otherwise.
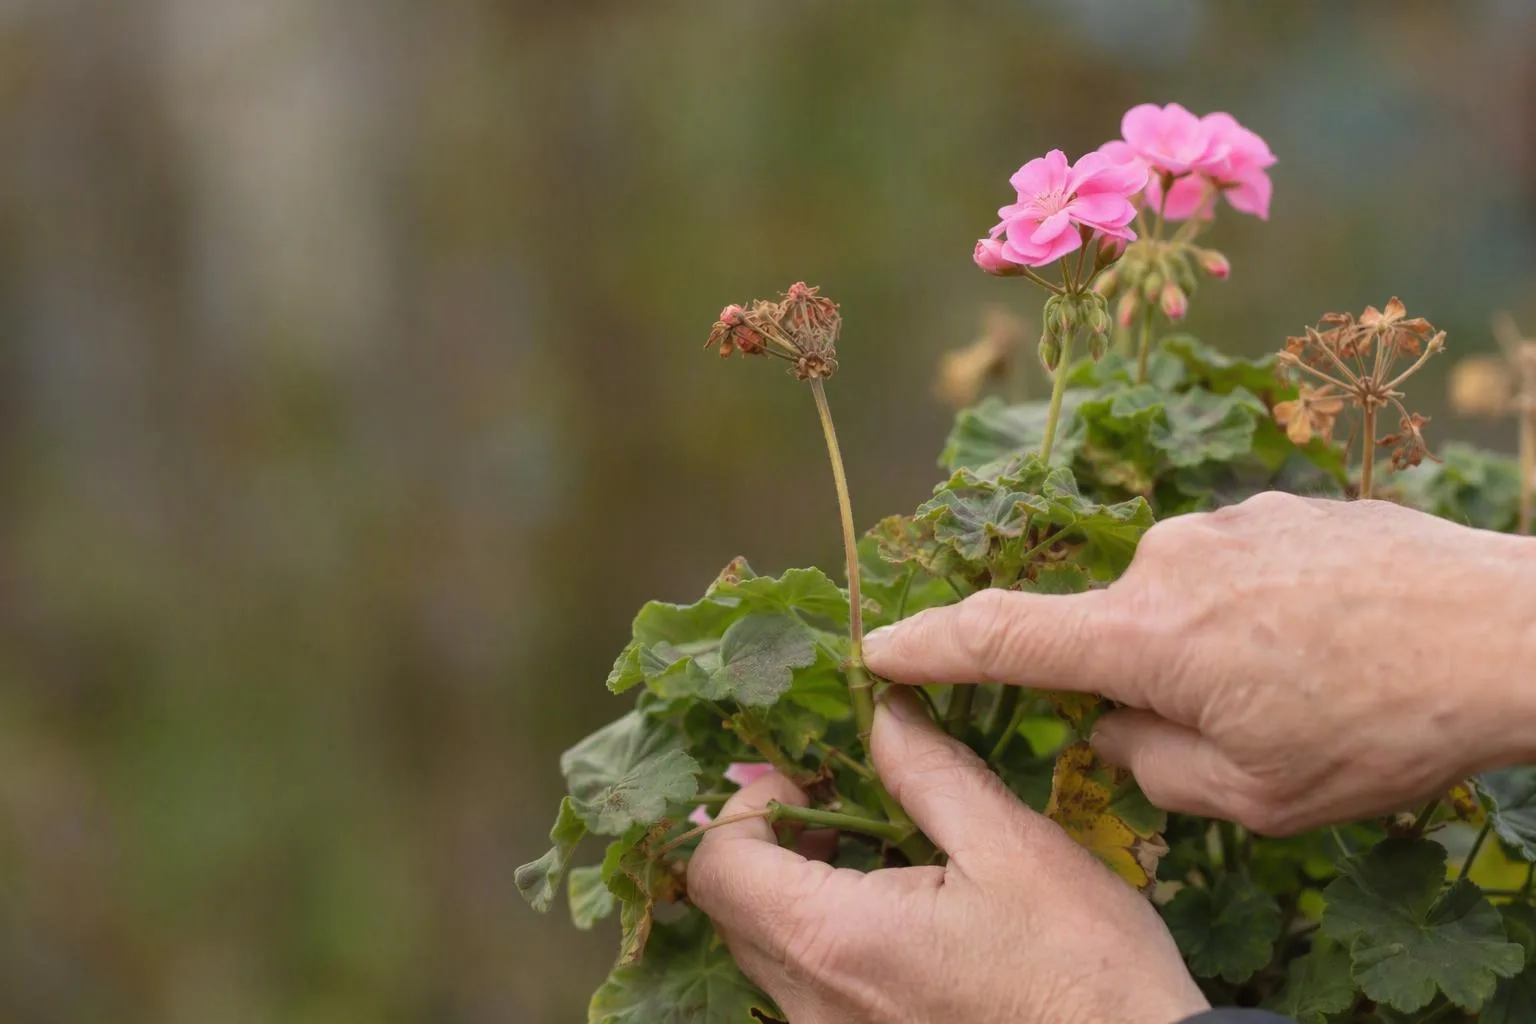
Make the cut at the flower stalk’s base, not beneath the petals
Look for a flower cluster that has passed its useful display. The petals may be shrivelled or fallen, and a small green swelling may be forming where the individual flowers were attached. That swelling is the developing seed capsule. Follow the narrow stalk beneath the cluster downward. It is often a paler, more flexible stem than the main shoot.
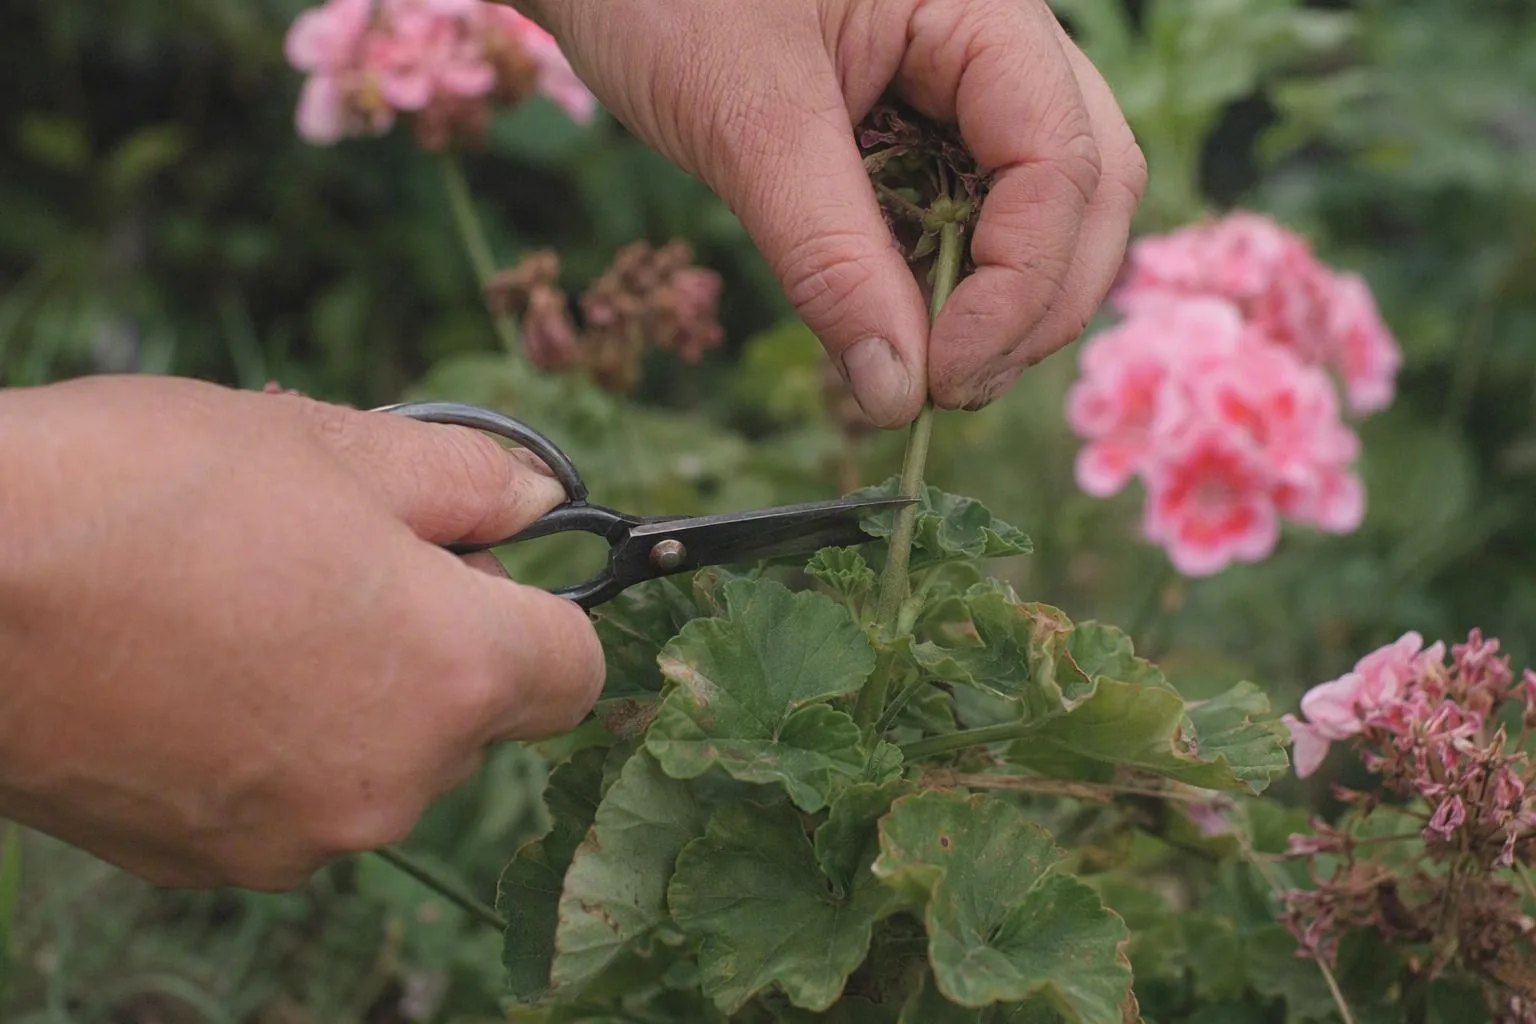
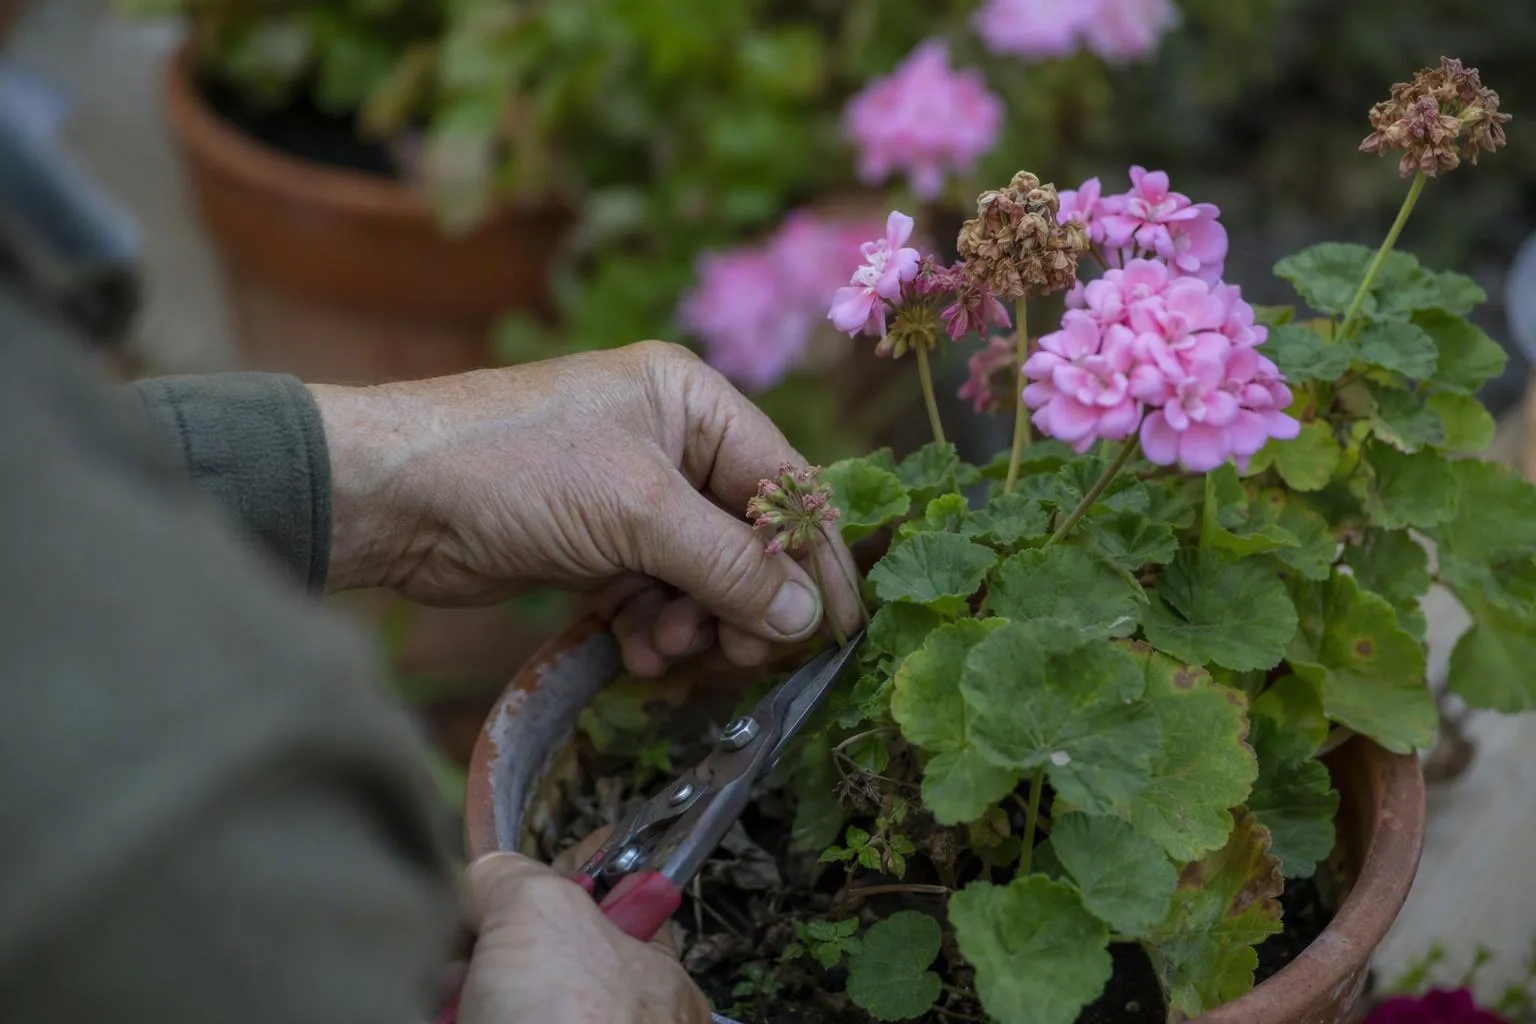
For most container Pelargoniums, the correct cut is at the stalk’s base. If the stalk pulls away cleanly without tearing the main stem, pinch or snap it off close to the junction. If it stays attached, use a sharp, clean pair of scissors or snips and cut just above the nearest healthy leaf node. You are removing the spent flower stalk; you are not shortening the leafy shoot that carried it.
That is the answer to “where to cut geraniums” in practical terms: cut below the flower cluster, above a healthy node, and take the whole flower stalk. A node is the point from which a leaf, side shoot, or dormant bud can emerge. Leaving a short stub is less damaging than gouging the main stem, so do not chase a perfectly flush cut if doing so risks tearing living tissue.
The reason is resource allocation. A flowering shoot must support leaves, stems, flowers, and, if pollination has occurred, seeds. Removing the seed-bearing structure removes one demand from that shoot. The plant may then maintain existing foliage and develop lateral buds, provided light, water, temperature, and nutrition are suitable. That is a biological possibility, not a promise that every cut produces another flower cluster.
Do not confuse this cut with pinching out a growing tip. Pinching a tip removes the shoot’s active apex and can encourage branching lower down. Deadheading removes a finished reproductive structure while leaving the leafy shoot in place. If the plant is tall, bare, or flopping, it may need structural pruning, but that is a separate decision.
There is one useful exception. If the flower stalk is attached to a section that is leafless, weak, or visibly damaged, follow that poor section back to a healthy leaf pair rather than leaving a long bare wand. The plant has fewer reasons to retain an unproductive stem, and the lower node gives regrowth a better starting point. Make that a targeted cut, not an excuse to remove every leaf around the spent flower.
A spent flower cluster tells you which cut the plant needs
Deadheading geraniums becomes much easier when you work from the cluster downward rather than from the main stem upward. The following sequence keeps the cut small and preserves the foliage that powers the next flush.
- Confirm that the cluster is finished. A few open flowers can remain while the oldest petals fade. Remove the cluster when its display has clearly declined, especially if the centre is beginning to swell into a seed capsule. Do not strip a cluster merely because one outer petal has browned.
- Find the cluster’s stalk. Ignore the individual flower stems and locate the single stalk carrying the whole umbel or cluster. Trace it down through the foliage until it reaches the main stem or a leaf junction.
- Brace the plant. Hold the main stem below the junction with one hand. This stops a brittle Pelargonium shoot from flexing while you pinch or cut.
- Remove the stalk. If it detaches with a clean, gentle snap, that is sufficient. Otherwise, use clean scissors and cut just above the nearest healthy node. A small remaining stub is preferable to a split main stem.
- Check the leaves you left behind. A sound leaf is not waste material. It is the photosynthetic surface supplying the shoot and roots. Remove yellow, rotten, or badly damaged leaves, but do not pluck healthy leaves simply to make the plant look sparse.
A 45-degree cut made about a quarter inch above a node is a workable geometry when scissors are needed. It leaves enough tissue to avoid cutting directly through the node while limiting the length of dead stub. I treat those measurements as a working rule rather than a botanical threshold: the useful decision is “close to the node without damaging it,” not whether the angle is exact.
Use a small, sharp blade for a few plants and wipe soil or plant residue from it before moving to another pot. If a stem is soft, blackened, or collapsing, do not drag that tissue through a healthy plant. Remove the affected part back to sound tissue and discard the debris rather than putting it on the compost heap. The practical safety point is simple: wash hands and tools after handling diseased plant material, especially before working on edible crops.
The junction varies slightly among Pelargonium types. Zonal Pelargoniums often present a clear flower stalk above a leaf node. Ivy-leaved forms can trail, so the stalk may emerge from a flexible side shoot. Regal types may carry larger, more crowded clusters and can have a shorter visible stalk. Scented Pelargoniums are often grown for foliage as much as flowers, which makes preserving healthy leaves particularly worthwhile.
During active flowering, inspect plants every few days rather than waiting for a single large cleanup. That rhythm lets you remove seed capsules while they are small and prevents a container from accumulating a mat of old stalks. The exact interval depends on temperature, light, cultivar, and how quickly the clusters fade; a hot, bright hanging basket can change noticeably between two checks.
After a major flowering flush, pause and look at the whole plant. If the stems are leafy and compact, continue removing individual stalks. If the plant has become long, bare, or lopsided, stop treating every problem as deadheading. Read the guide on How to Prune Leggy Pelargoniums Without Losing the Next Flush of Flowers before making a deeper cut. The purpose has changed from removing finished flowers to rebuilding the shoot framework.
When deadheading quietly fails: seed capsules, heat, and the wrong plant
When a geranium produces few new flowers after deadheading, check the growing conditions before making a harder cut. Deadheading removes one reproductive demand; it does not manufacture light or replace root space.
Three cuts that look similar but do different jobs
| What you remove | Where the cut belongs | What the cut is trying to change |
|---|---|---|
| Spent Pelargonium flower stalk | At its base, just above a healthy node | Removes the fading cluster and developing seed capsule |
| Leggy Pelargonium stem | Back to a leafy node on sound, useful growth | Rebuilds branching and reduces bare stem |
| Flowering hardy Geranium | Often back toward basal foliage after a flush | Renews the clump and removes tired flowering stems |
If the plant is making pointed green seed capsules, the timing of the cut may be the problem. Removing only the petals does not remove that capsule. If the foliage is pale and stretched, light is the first check. If the pot dries within hours or roots circle densely at the drainage holes, root restriction is a stronger suspect than poor deadheading. If growth is lush but flowers are scarce, excessive nitrogen is worth questioning rather than automatically adding more feed.
Heat creates a second trap. A Pelargonium can have plenty of flower stalks removed and still pause flowering when the root zone repeatedly overheats or the plant cannot replace water lost through its leaves. Read Why Geraniums Stop Flowering in Summer Heat before responding with a hard prune. A shorter plant is not necessarily a less-stressed plant.
Watering should be steady enough to prevent repeated severe wilting, but a container should not sit in stagnant water. The roots need both moisture and air spaces. Correct the watering pattern first; cutting off healthy shoots while the root zone remains unsuitable merely reduces the plant’s ability to recover.
Temperature can also alter the result. Cool conditions slow growth and bud development; very hot conditions can interrupt flowering even when the plant has adequate foliage. These are reasons to expect a delay, not reasons to keep cutting farther down the stem. My working rule is to make one environmental correction and then observe the plant’s new growth before performing another structural cut.
Finally, check the plant’s name. A hardy Geranium may form a spreading mound and send up many flowering stems from the crown. It is not managed like a compact bedding Pelargonium. After a flowering flush, a hardy Geranium can often be cut back toward its basal foliage, leaving the crown and any fresh low growth intact. The exact response varies by species and cultivar, so treat the plant’s growth habit as the deciding evidence.
A hard cutback of roughly 6 to 8 inches is sometimes used on an overgrown Pelargonium when the remaining lower stems are leafy and healthy. I regard that as a working range, not a universal prescription. If the cut would leave a bare stump with no viable nodes, it is too severe for that plant. If the plant is being prepared for winter, the decision belongs in a wider plan; see Overwintering Geraniums: When to Cut Back, Bring In, and Reduce Water.
Build deadheading into the flowering season instead of doing one hard cleanup
Deadheading works best as a small maintenance loop. Check, remove, inspect the plant, and then correct the condition that determines whether new buds can develop. One hard cleanup at the end of summer is mainly cosmetic; it cannot undo weeks of mature seed capsules or lost foliage.
For a container or bedding Pelargonium, use this seasonal sequence:
- At the start of flowering: learn where each cultivar carries its flower stalks. Mark the difference between a flower stalk and a leafy side shoot before making the first cut.
- During the main display: inspect every few days. Remove finished clusters individually, taking the stalk back to its base while leaving sound leaves in place.
- After a heavy flush: inspect the plant’s shape. Continue light deadheading if it is compact. If stems are bare or crossing, switch to structural pruning rather than making dozens of random tip cuts.
- During difficult heat or low-light periods: prioritize shade timing, root-zone moisture, drainage, and light exposure. Deadhead for appearance, but do not interpret a flowering pause as proof that the cut was wrong.
- Before overwintering: stop treating every spent flower as the main task. Decide whether the plant needs a planned reduction, pest inspection, or a change in water and light.
For timing, my working rule is to expect a visible response on a healthy, actively growing plant within roughly 10 to 14 days in good light, while allowing longer if the plant is cool, shaded, recently moved, or heat-stressed. A hard cutback can take roughly 18 to 21 days before a useful reblooming response becomes apparent, because the plant must activate lower buds and rebuild shoot length. Those are planning windows, not promises.
Zonal Pelargoniums may show a quicker response when several healthy nodes remain. A working range of about 10 to 12 days for the first signs of renewed bud activity is reasonable under bright, warm growing conditions, but it should not be used to diagnose failure on a shaded or recently transplanted plant. If nothing changes after the expected window, inspect light, root space, watering, and nutrition before repeating the cut.
On a vigorous plant with a healthy canopy, a single removed cluster may be followed by three to five new visible buds around the next growth points. I treat that as an observation-based rule of thumb, not a guaranteed count. The derivation is straightforward: each intact leafy node can contain a dormant or developing side bud, but cultivar, light, temperature, and plant age determine how many actually break.
The best time of day is when the foliage is dry and the plant is not wilting. That makes the stems easier to handle and lets you see whether a cut has torn tissue. There is no advantage in waiting for a particular clock hour if the plant is dry and stressed; water appropriately, let it recover, and then work.
For hanging baskets, lift or turn the basket enough to see the stalk bases. Deadheading only the visible flower heads from below is how long stubs and hidden seed capsules accumulate. For bedding plants, work along the row and remove the oldest clusters first, but avoid trampling the crown or pulling on neighbouring stems.
If pruning has produced usable, healthy stems, Rooting Geranium Cuttings From Pruned Stems is the next decision, not an automatic step. A stem is suitable for propagation only when it is firm, disease-free, and has viable nodes. Spent flower stalks themselves are generally poor candidates because they are not the same as a leafy vegetative cutting.
So the question after deadheading is not “Should I cut more?” Ask instead: is the plant still carrying healthy leaves and receiving the conditions needed to make buds? If yes, keep removing flower stalks at their base. If no, change the growing conditions or make one deliberate structural cut, then give the Pelargonium time to show which buds are still alive.