Composting for Beginners: Build a Heap That Actually Heats
A compost heap built to roughly 1 cubic metre can begin warming within several days; a shallow bin holding a few handfuls of scraps may stay almost cold for the entire season. For composting for beginners, the decisive ingredients are simple: enough damp, nitrogen-rich material; enough dry, fibrous carbon; enough air space; and enough total mass to hold the heat made by microbial respiration.
Start with a mixed heap about 1 m³ (roughly 3 ft³), dampen dry ingredients as you add them, and keep a bag of dry leaves or shredded cardboard beside the bin. That reserve is more useful than any bottled “activator”. Add it whenever food scraps make the heap dense, shiny, or sour-smelling.
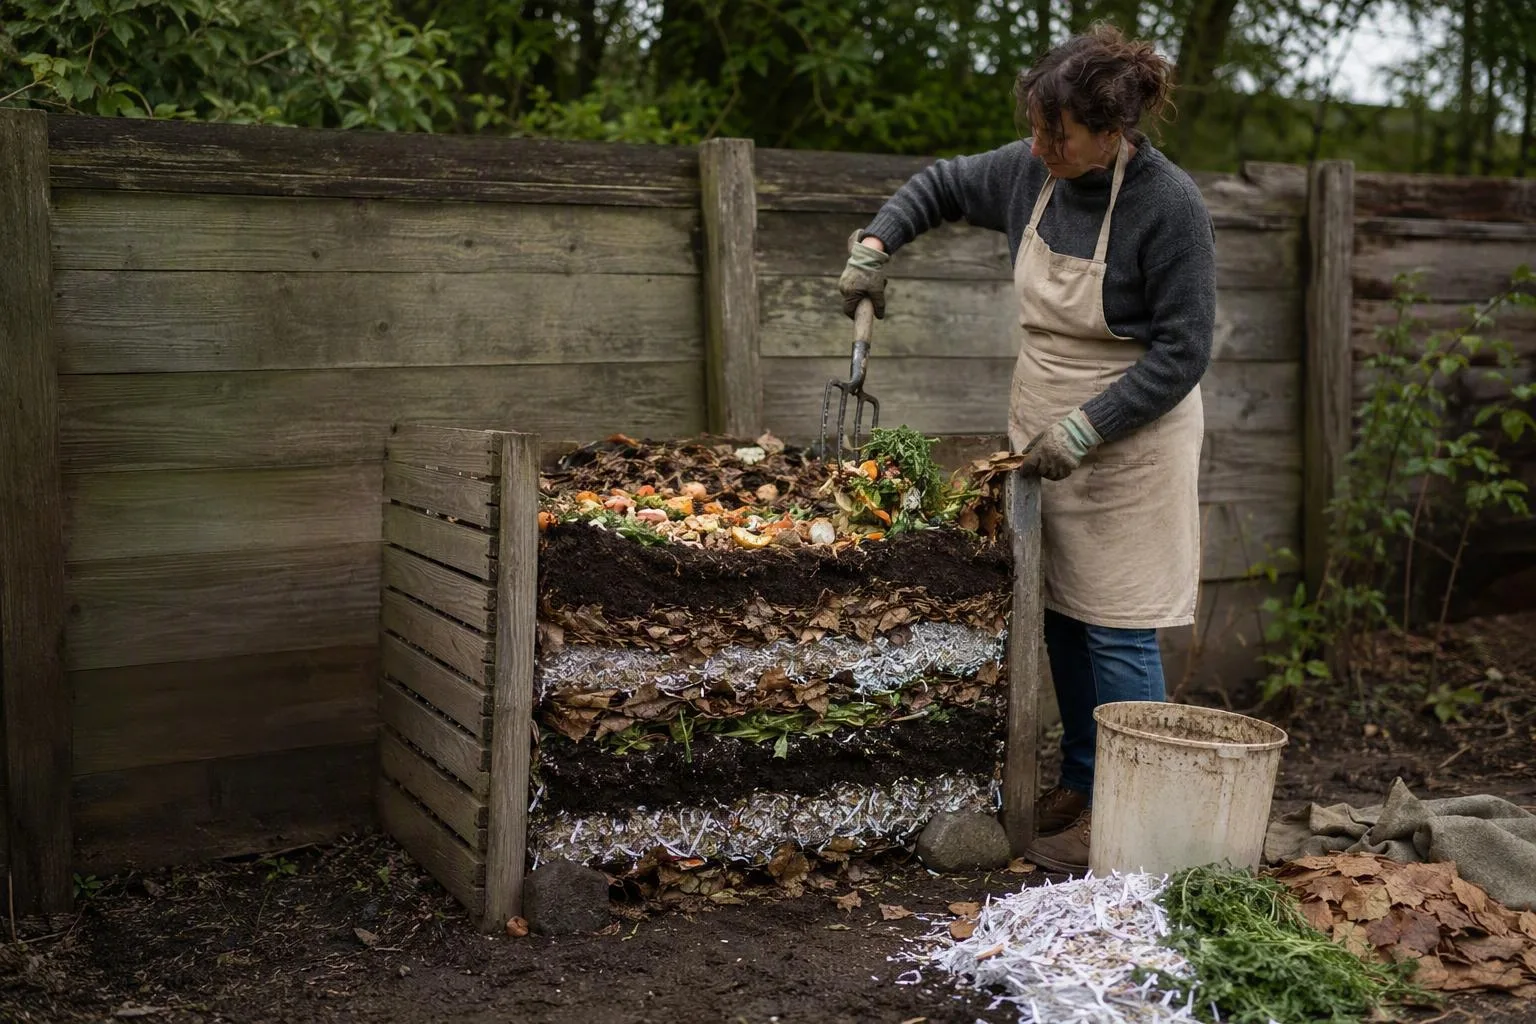
A hot heap starts with the right conditions, not a special bin
The container matters less than the contents. Pallets, wire mesh, a timber bay, and a commercially made compost bin can all work if the pile has room for air and can be turned. A sealed plastic container can also process scraps, but it needs careful management because compacted food waste quickly loses its air spaces. The biological process is the same; the margin for error is smaller.
Microbes consume carbon compounds and nitrogen-containing material. As they respire, some of the energy in that food becomes heat. A large, damp, well-mixed heap retains that heat in its interior. A small heap loses it through its exposed surface faster than the microbes can replace it. That is why “my compost is cold” is often a volume problem before it is a recipe problem.
For a first hot heap, aim for:
- Enough mass: build toward roughly 1 m³ rather than repeatedly feeding a tiny container.
- Mixed moisture: combine wet green material with dry material, then moisten dry leaves, straw, or cardboard as they go in.
- Open texture: include stems, coarse leaves, torn cardboard, or small twigs so the heap does not become a solid plug.
- Protection from extremes: shelter the heap from driving rain and strong drying winds without wrapping it so tightly that air cannot enter.
The target moisture is familiar: a handful should feel like a wrung-out sponge. If water runs from it, the mix is too wet or too compacted. If it falls apart as dusty flakes, microbes have too little water to work with. Neither hand test is a laboratory measurement, but both reveal whether the next correction should be dry material or water.
A correctly assembled heap may warm within several days. That is a reasonable expectation, not a promise. A pile built from dry autumn leaves alone, a heap exposed to winter wind, or a batch made mostly from a few kitchen scraps may never become substantially hot. The useful question is not “does every pile heat?” but “does this pile contain enough active material, moisture, oxygen, and insulating mass to retain heat?”
Build the recipe by texture and moisture, not by a rigid brown-to-green ratio
Carbon and nitrogen are useful labels, but they are poor ingredients to measure with a kitchen scale. Dry leaves, shredded cardboard, straw, and woody stems are generally carbon-rich and provide structure. Fresh grass, leafy weeds, vegetable scraps, and many manures generally provide more nitrogen and moisture. Microbes need both: carbon supplies much of the structural energy source, while nitrogen supports microbial growth and the enzymes involved in decomposition.
Use the materials you have, but judge them by two properties at once: how wet are they? and how likely are they to collapse into a dense layer? Fresh grass clippings are moist and nitrogen-rich, yet a thick layer can mat into an airless sheet. Dry leaves provide useful carbon and some structure, but they can shed water if added in a dry, unbroken mass. Chopped vegetable scraps are wet and easily decomposed; shredded cardboard is dry and absorbent. Straw is coarse and airy, though it decomposes more slowly than soft leaves. Woody chips are valuable for long-term structure but are usually too slow and carbon-heavy to form the bulk of a beginner’s fast heap.
A practical starting pattern is a thin layer of moist greens, a thin layer of dry browns, and a scatter of coarse material repeated as the heap grows. There is no magic number of alternating layers. The point is to prevent a concentrated wet layer and to distribute moisture through the dry material. Keep extra browns within reach. If the pile later feels slick or smells sharp, correcting with dry material is easier than trying to extract a sodden layer.
| Material | What it contributes | What can go wrong |
|---|---|---|
| Fresh grass clippings | Moisture and readily available nitrogen | Thick layers collapse and restrict air |
| Leafy weeds | Moist green material and varied texture | Seed heads may survive in a cool heap |
| Vegetable scraps | Water and easily decomposed food | Large amounts compact and attract pests |
| Dry leaves | Carbon and fibrous bulk | Dry leaves may repel water until torn or wetted |
| Shredded cardboard | Dry carbon and absorbent structure | Large flat pieces can form wet mats |
| Straw and small stems | Air space and slower structural carbon | Long pieces slow mixing and screening |
| Woody chips | Persistent structure | They can slow a fast batch if used as the main ingredient |
Use finished compost or ordinary garden soil only as an optional inoculum. A handful can introduce organisms, but a healthy heap does not depend on a proprietary starter. The organisms that decompose plant material are already present on many garden and food scraps.
For edible beds, exclude pet waste and inputs contaminated with chemicals, plastics, or persistent herbicide residues. Meat, dairy, and cooked food can be processed in managed systems, but an unmanaged beginner heap may turn them into a pest and odour problem. Before adding them, check the rules for your local collection scheme or use a system specifically designed for those materials. Do not apply immature compost or fresh manure directly around crops that will be eaten soon; follow local food-safety guidance and allow material to mature.
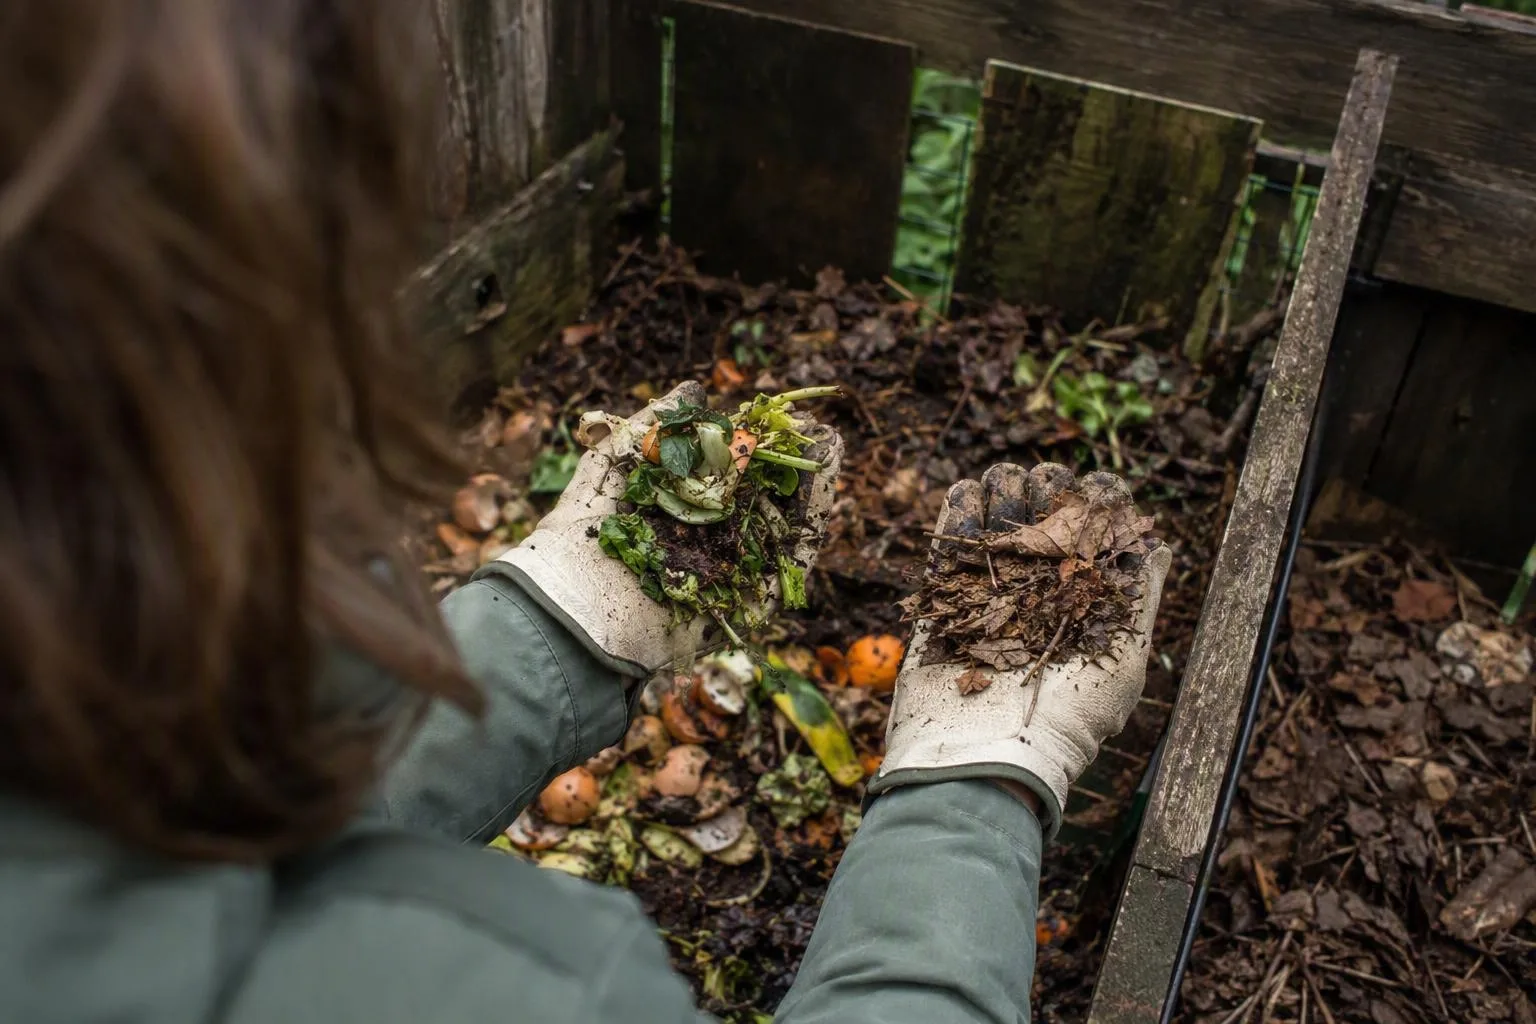
The first week: assemble, wet, and turn before the pile stalls
Think of the first week as a short process log rather than a single construction day.
Day 1: make the pile capable of breathing
Chop thick stems and large vegetable pieces where practical. Tear cardboard into smaller pieces rather than laying down intact sheets. Mix dry leaves with wetter ingredients so the leaves are not left in a waterproof pocket. As the heap rises, wet dry material in thin layers. The aim is even moisture, not a saturated surface.
Do not compress each layer by stamping on it. A heap needs contact between ingredients, but it also needs connected air spaces. A few coarse stems or a loose handful of straw can make a difference in a pile otherwise dominated by soft scraps.
Days 2–4: look for a warm centre
A compost thermometer gives you a more repeatable check than your hand, but a hand test still helps: open a small gap into the centre and compare it with the outer material. A warming centre means microbial activity is producing more heat than the heap is losing at that moment. It does not prove that every part of the heap is equally active.
If the centre is cold, check the physical setup before adding more food. Is the heap smaller than a large garden bag? Is it mostly dry leaves? Did rain saturate the bottom? Is it made almost entirely from food scraps? These questions identify different corrections. A small dry heap needs more damp material and mass; a wet food-heavy heap needs dry structure and air.
Days 5–7: turn when the centre has compacted
Once the middle is warmer or more compressed than the outside, turn the heap so the cool outer material moves inward. Lift and mix rather than merely stirring the top few centimetres. Break up clumps of grass and spread wet pockets through dry material. If the material is dry inside, add water in several places while turning instead of pouring it only over the finished surface.
Turning restores oxygen and redistributes moisture, but more turning is not automatically better. Each full turn releases heat and can interrupt the warm period before the microbes have processed the current batch. Turn when the centre is compacted, oxygen-starved, unevenly wet, or noticeably hotter than the edges, not simply because a calendar says the heap must be disturbed.
After the first turn, allow the pile to settle into its next phase. A heap that warms, cools, and shrinks has made progress even if it never reaches a dramatic thermometer reading. Add fresh material in a mixed form, not as a thick green cap.
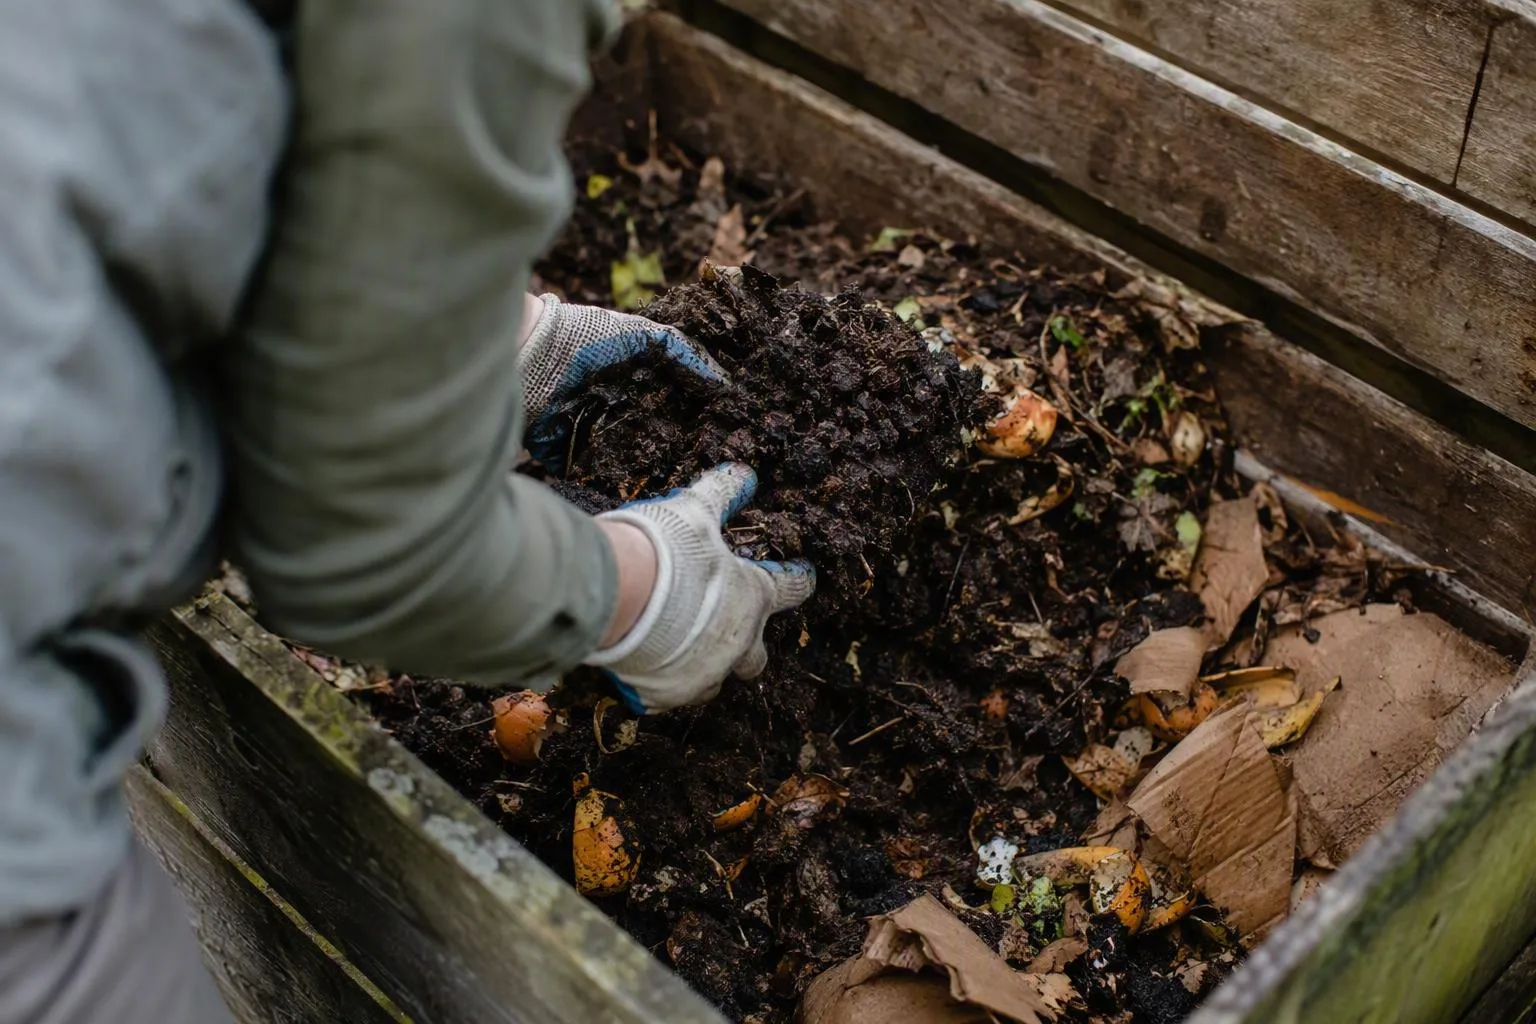
Read the failure pattern: cold, sour, slimy, or dry piles each need a different correction
“Add more scraps” is a poor universal diagnosis. The surface can look inactive while the centre is working, or the centre can be active while the outside remains recognisable. Open the heap and inspect its smell, texture, moisture, and distribution before changing the recipe.
Cold from the start
Check in this order: total volume, moisture, nitrogen-rich material, then exposure to cold or wind. A heap below the size needed to retain heat may need consolidation rather than more frequent turning. A dry heap needs water worked into multiple layers. A heap made almost entirely from dry leaves needs wetter, faster-decomposing material mixed through it. If all three are present, winter temperatures may simply be slowing the process.
Wet, sour-smelling, or slimy
A sour smell and glossy, collapsed texture point toward poor air exchange. Add coarse dry browns such as torn cardboard, dry leaves, straw, or small stems. Mix through the wet centre and check whether water is collecting underneath. If the base is sealed against the ground, improve drainage or move the heap onto a surface where excess water can leave. Do not solve a sour heap by adding still more water.
A sharp ammonia smell calls for a related but distinct correction. It usually indicates that a large amount of nitrogen-rich material is decomposing without enough carbon structure to hold air and absorb moisture. Mix in dry browns, loosen the mass, and avoid adding another load of fresh grass or food scraps until the texture improves. The correction is physical: restore air spaces and dilute the concentrated wet material.
Dry and shrinking without warming
Dry leaves can shrink and settle while remaining too dry for sustained microbial activity. Pull the heap apart during a turn and wet the inner layers gradually. Water poured on top may run around dry pockets instead of entering them. If the material repels water, tear or crush it and mix it with moist greens before wetting again.
Warm once, then stalled
The first flush of easy-to-decompose material may be depleted. Turn the heap, inspect the remaining texture, and add a modest amount of fresh green material only if the batch is now mostly dry, fibrous browns. If the remaining material is wet and compacted, add browns instead. The symptom “stopped heating” does not identify the correction by itself.
Questions about timing fit inside this diagnosis. A balanced, actively managed batch may produce recognisable compost in a few months, while a cool or passive heap commonly takes longer. Judge readiness by the material’s condition rather than by age alone: it should be dark or brown, crumbly, earthy-smelling, and largely free of recognisable fresh scraps. A few woody pieces can remain and be screened out. If the material still heats strongly after mixing or contains obvious food scraps and wet clumps, give it more time.
A small-bin plan for winter, shade, and limited garden space
A kitchen caddy feeding a small outdoor bin often lacks the mass needed for thermophilic heat. In cold weather, consolidate scraps instead of spreading them through several tiny containers. Store dry leaves in breathable bags or a covered bay, chop bulky scraps where practical, and freeze food scraps if that helps you accumulate a larger batch without odour. Partial shade is useful because it reduces surface drying, but shade cannot compensate for a heap that is too small or too wet. A sheltered, adequately sized pile beats a shaded, airless one.
For a very small garden, accept a slower process or use a managed municipal scheme. Repeatedly opening and turning a tiny heap to chase heat can lose more warmth than it creates.
When “hot” is the wrong goal
A cool, well-aerated pile can still become useful compost. Hot composting is attractive because it processes suitable material faster and can reduce some weed seeds and pathogens when the whole batch reaches appropriate conditions for sufficient time. Home heaps are uneven, though, so a hot reading in one pocket is not proof that every part has been sanitised. Mature the material before use, and follow local guidance where pathogen, manure, or persistent weed-seed concerns apply.
Chasing heat with excessive grass clippings or manure is a bad trade. The extra nitrogen can create a dense, wet core, ammonia odour, and nutrient loss through leaching. Passive composting asks for less labour and tolerates a smaller flow of material, though it usually asks for more patience. For most home growers, a consistently aerobic cool heap is preferable to a dramatic hot heap that collapses into slime.
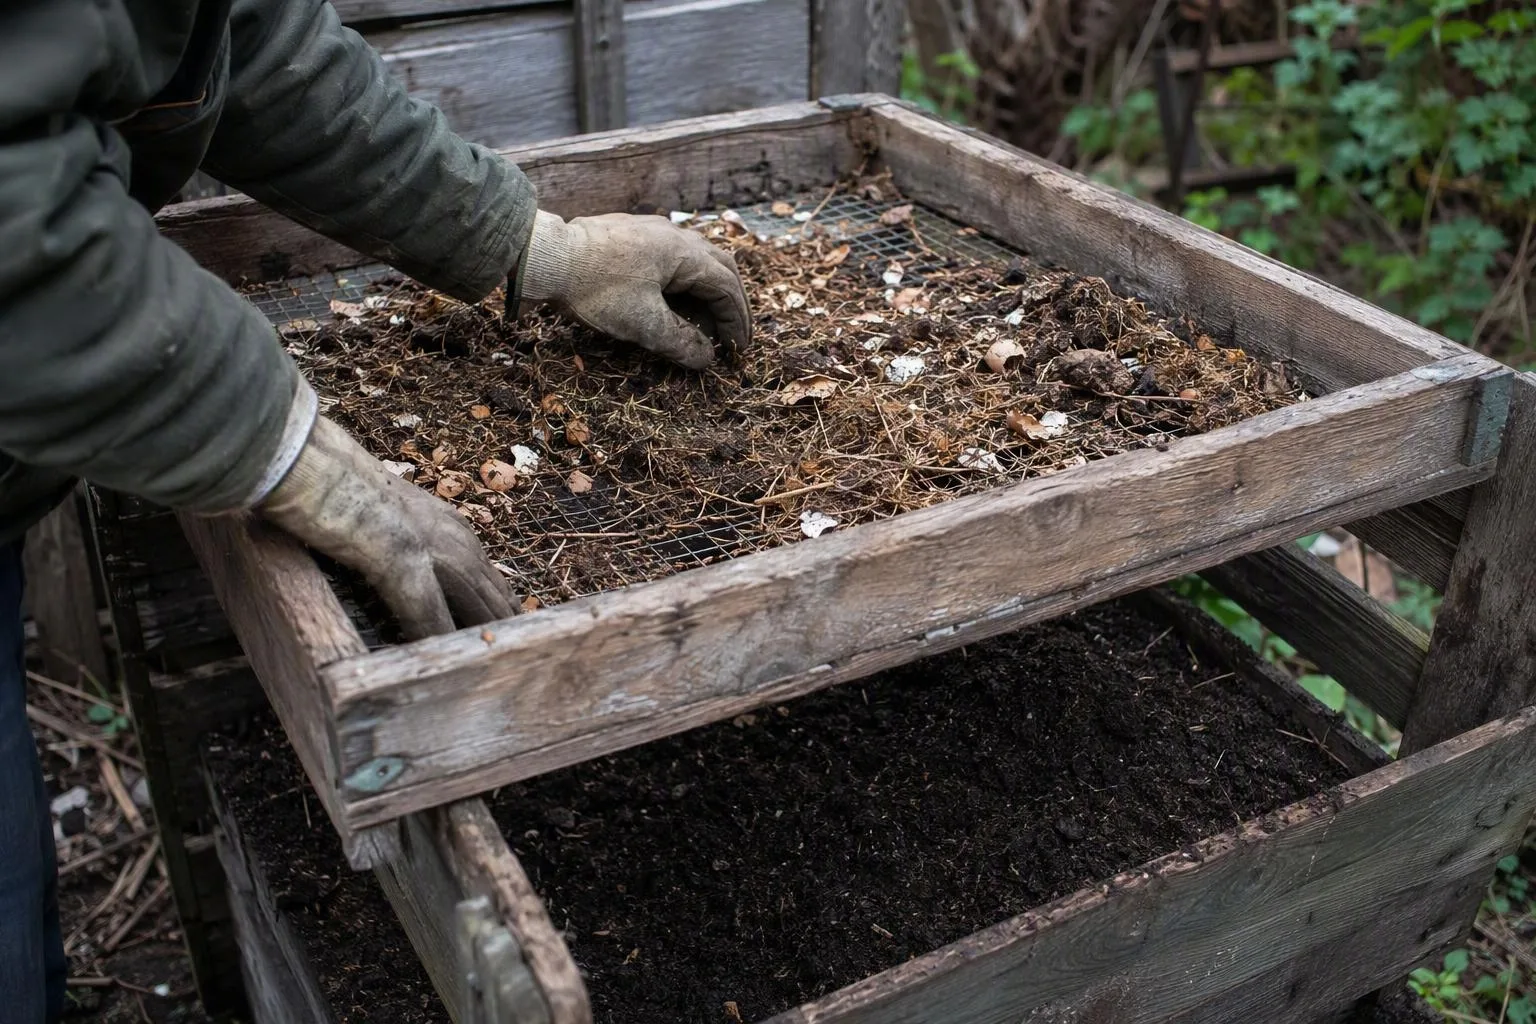
Turn the finished batch into a soil input, not a replacement for soil
When the heap has stopped heating and the material looks mostly uniform, screen or break up coarse pieces. Return large woody fragments to the next batch if they are still firm. Let the finer material cure further if it smells raw, contains many recognisable scraps, or reheats noticeably after mixing.
Finished compost contributes organic matter and helps soil aggregates form and persist. That can change how water enters, drains, and is held in the root zone, while the living community associated with mature organic matter continues to process residues. Those benefits develop through repeated additions and interaction with the existing soil; compost is not a replacement for the mineral fraction, pore space, or complete nutrient plan of a growing medium.
Nutrient release is also not a predictable fertiliser dose. Feedstock, maturity, rainfall, and application rate all affect what becomes available. Use compost as a soil-building input, not as permission to fill a planting hole entirely with it. A thin surface layer worked lightly into the topsoil is usually easier to manage than a deep pocket of rich, fine material around roots.
If a batch failed, let the failure choose the next move:
- Cold and dry: reserve more greens, add water through the heap, and build a larger batch.
- Wet and sour: store more dry leaves or cardboard and add coarse material before the next load of scraps.
- Hot once, then stalled: turn at the first compacted centre and keep a small amount of fresh green material available.
- Slow but earthy and crumbly: stop chasing temperature and allow curing to finish.
For a deeper maturity check, use the decision points in How to Tell When Compost Is Ready for the Garden. If the goal is a raised bed, compare compost with other organic inputs in Compost vs Aged Manure: Which Improves Raised-Bed Soil More? Dry leaves are worth treating as a stored resource; How to Store Dry Leaves for Next Season’s Compost covers that reserve. And if a wet compost layer is being reused as a surface mulch, read Why Mulch Mats Into a Wet Layer and How to Prevent It before spreading it thickly.
The next decision is practical: cure this batch longer, start a second batch with a larger carbon reserve, or change one physical condition that caused the failure. Record that condition beside the bin. “Too wet at the base” or “mostly dry leaves” will guide the next build far better than simply writing “compost failed.”
For accepted inputs, manure handling, and food-safety questions, check current guidance from your local extension service or municipal composting authority. Rules differ by place and by the crops you intend to grow.
Frequently Asked Questions
Can composting for beginners include meat, dairy, or cooked food?
Explain that these materials can attract pests and create odor in an unmanaged home heap; beginners should generally exclude them unless using a managed system designed to process them, and should follow local collection or municipal composting rules.
Why does my compost pile smell like ammonia?
Link the sharp ammonia smell to an excess of nitrogen-rich material, especially fresh grass or manure, and recommend mixing in dry carbon materials and restoring air space rather than simply adding more water.
How long does a compost pile take to become usable?
Give a range rather than a guarantee: a balanced, actively managed pile can produce recognizable compost in a few months, while cool or passive piles commonly take longer; maturity depends on texture, smell, remaining ingredients, moisture, and temperature history.